Houston
On this page
When you have finished setup and any update has completed, open the Apps tab in Launchpad. Find Houston and tap the orange play button to launch it.
Houston Home Screen
The Home pop-up provides shortcuts to your pedalboard, presets, songs, setlists, tuner and settings. Open it with a brief press of the tl logo button on the left of Artemis. Tap a shortcut to continue, or press a footswitch to return to your previous screen.
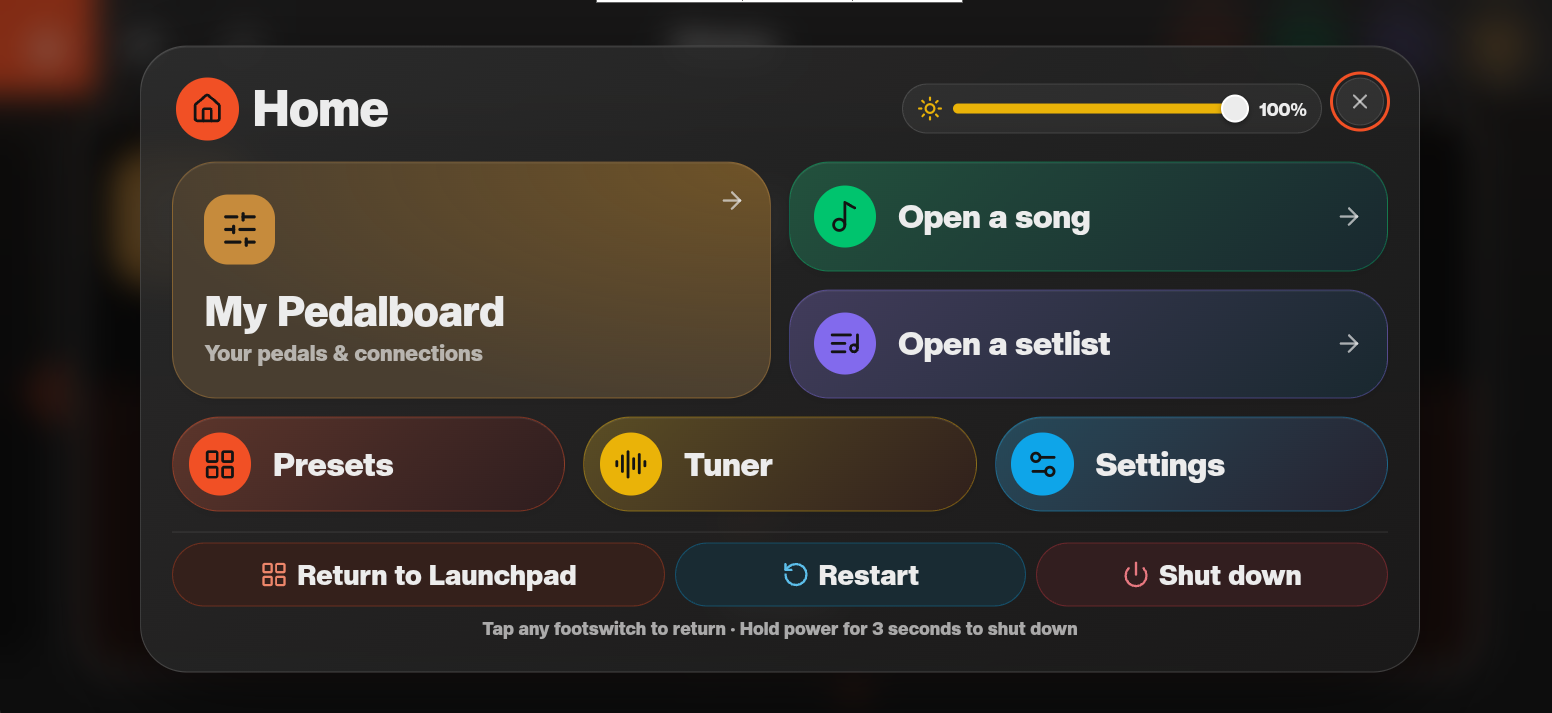
The following sections introduce the main areas of Houston. To connect your instrument and get your first sound, follow Quick Start. For footswitch hold actions, brightness, tuner appearance and expression setup, see Common Settings and Preferences.
My Pedalboard
My Pedalboard tells Artemis which pedals are connected to each physical loop. The names and colours you choose help you recognise those pedals in the Preset Editor. Set up My Pedalboard when you first open Houston, before building your presets.
Setup order: check your connections → choose a pedalboard configuration → add pedals to the library → assign them to the matching loops → check the result before building a preset.
1. Check your physical connections
Start with the pedals connected to Artemis and make a note of which loop each pedal uses. See Connections for send/return wiring and Routing Basics for signal-path options.
Plan your loop connections before setup: L1–L3 can be assigned to either Bus A or Bus B; L4–L5 are restricted to Bus A. Connect any pedal you need on Bus B to L1, L2 or L3. L6/L7 form the fixed stereo loop.
The walkthrough uses the following physical setup:
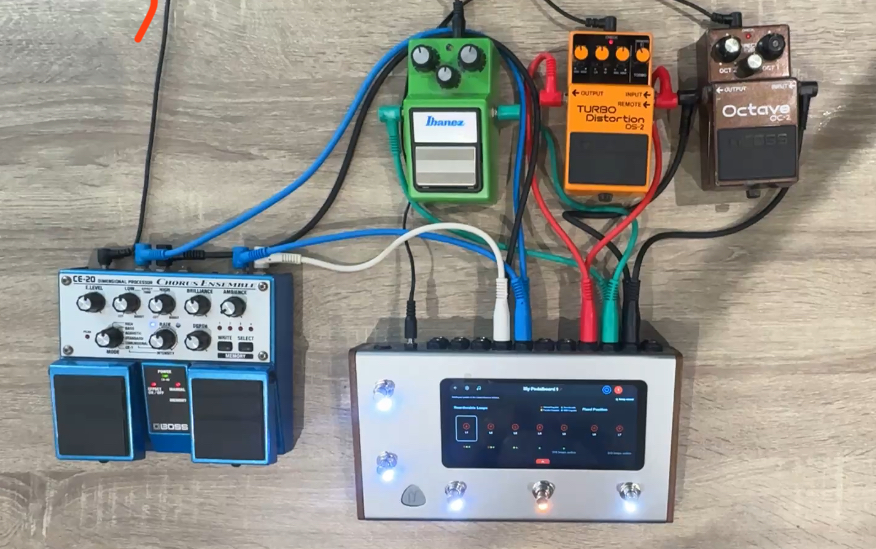 Physical pedalboard used for the walkthrough
| Artemis loop | Connected pedal | Name used in My Pedalboard |
|---|---|---|
| L1 | BOSS OC-2 | OC-2 |
| L2 | Ibanez TS9 | TUBE SCREAMER |
| L3 | BOSS DS-2 | DS-2 |
| L4–L5 | Unused | Leave empty |
| L6/L7 | BOSS CE-20, connected in stereo | CE-20 in both L6 and L7 |
2. Open My Pedalboard and choose a configuration
Open My Pedalboard using the shortcut in the Home pop-up. Alternatively, tap the Home icon in the top navigation bar to open the home carousel, find My Pedalboard, and tap Edit.
Choose the pedalboard configuration you want to set up using the numbered selector in the navigation bar. You can keep separate configurations for different physical pedalboards, such as boards you use with different bands. This walkthrough uses My Pedalboard 1.
On first setup, the loop slots are empty:
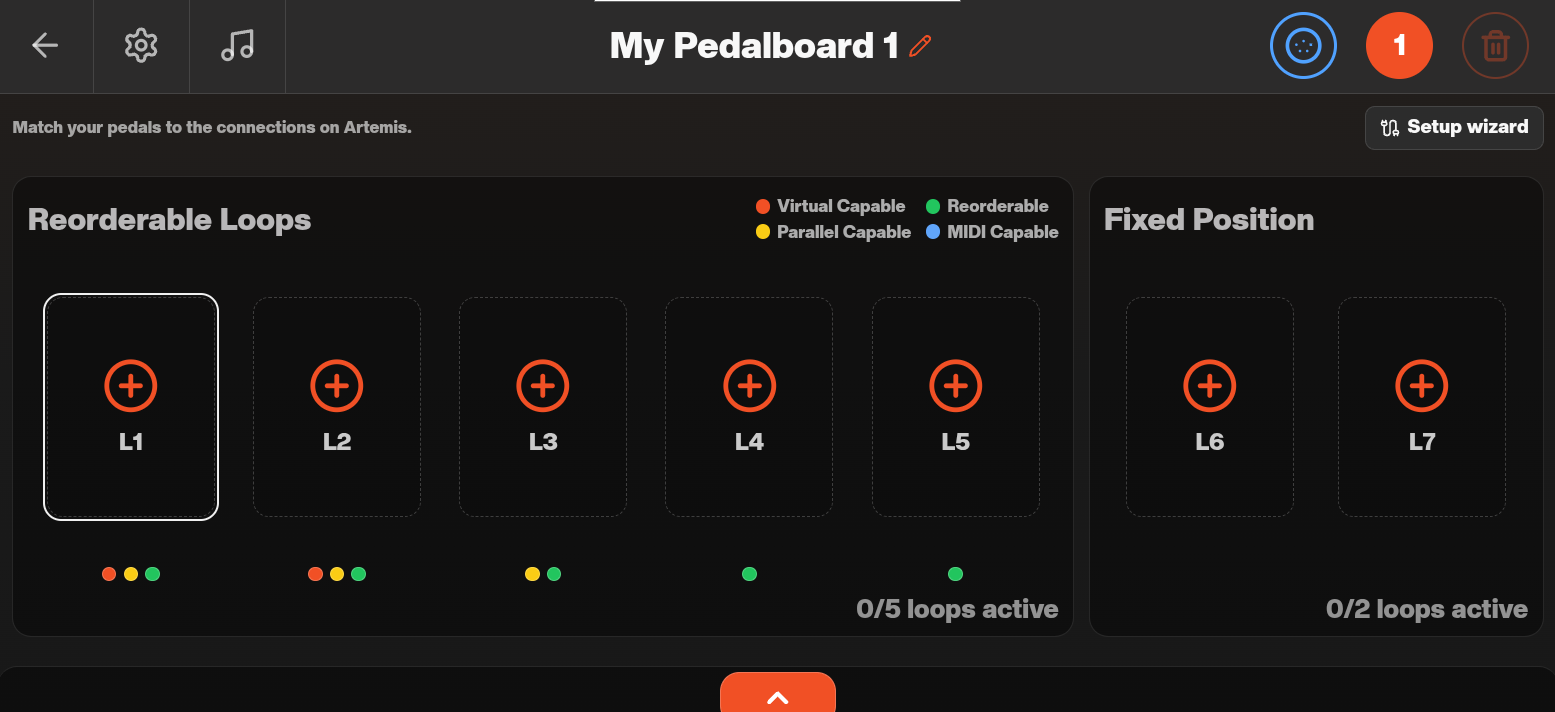 My Pedalboard 1 with empty loop slots
3. Add your pedals to the library
Create one library entry for each pedal in the example:
- Drag the library drawer up from the bottom of the screen and tap + Add Pedal. You can also begin by tapping an empty pedal slot.
- Enter a Pedal Name, then choose a Category and Colour. Use a name and colour that make the pedal easy to recognise.
- Tap Add to add the pedal to your library.
- Repeat for the remaining pedals. Create the stereo CE-20 entry once; you will use it in both L6 and L7.
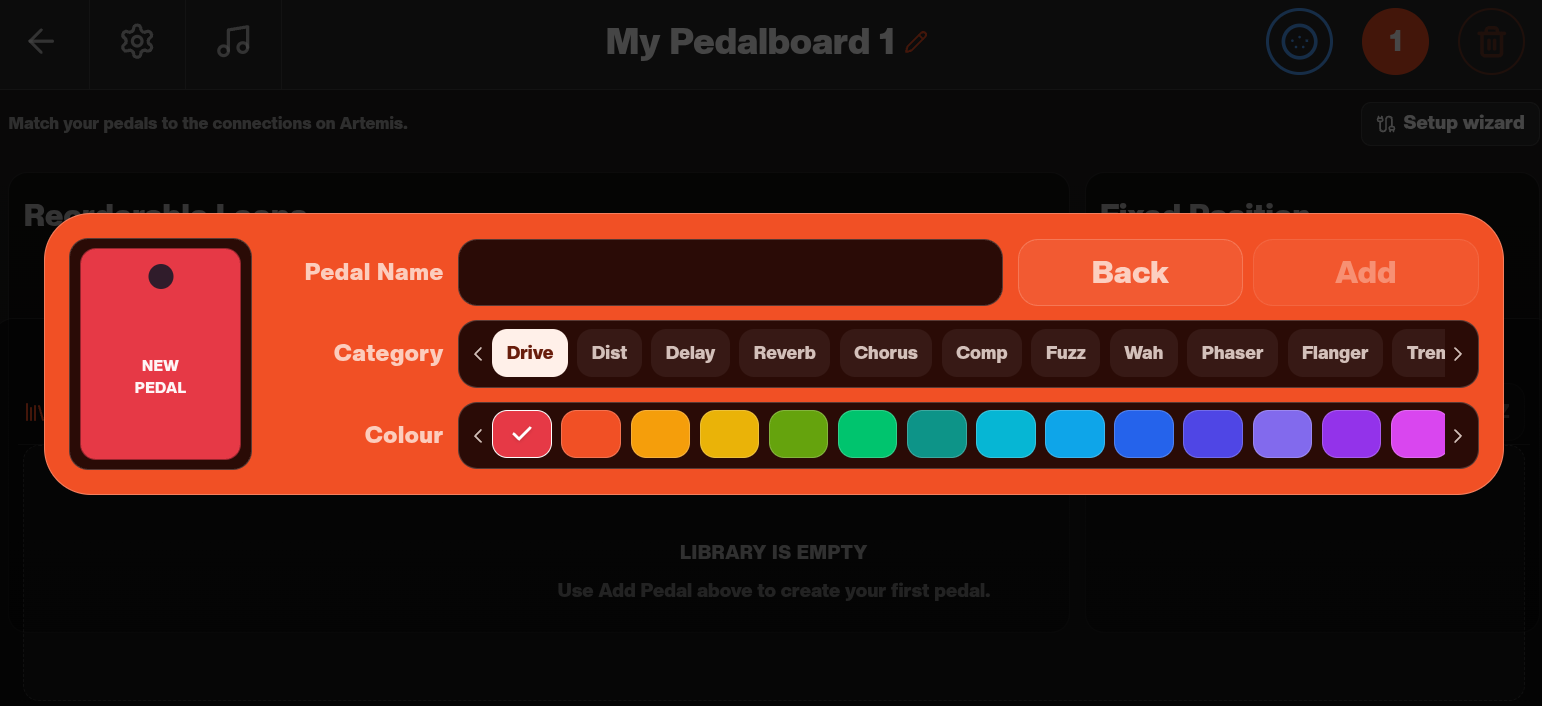 New pedal dialog with Pedal Name, Category, Colour and Add controls
Your library should now contain OC-2, TUBE SCREAMER, DS-2 and CE-20. The order in the library does not determine their loop assignments.
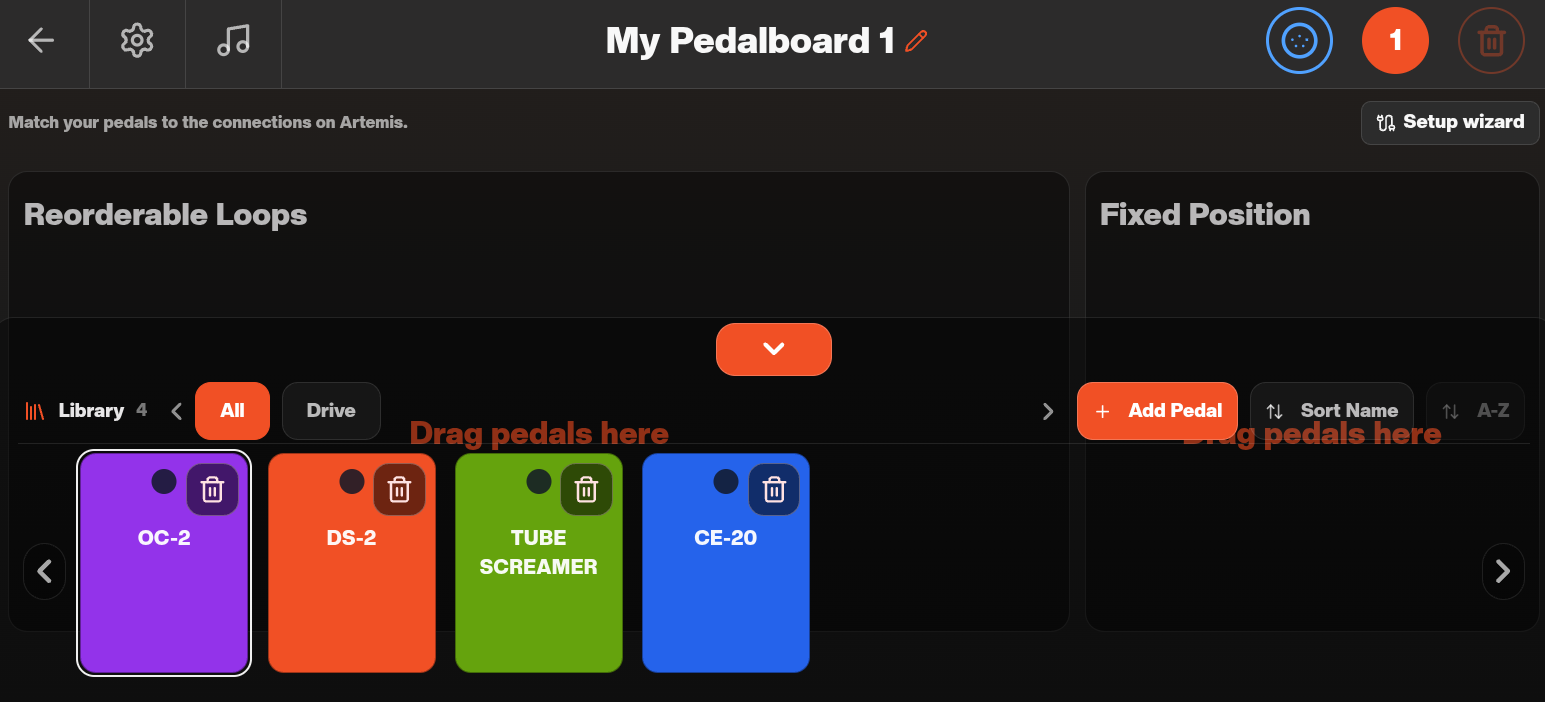 Pedal library containing the four example pedals
4. Assign pedals to the matching loops
Drag each pedal from the library into the slot that matches its physical connection:
- Drag OC-2 into L1.
- Drag TUBE SCREAMER into L2.
- Drag DS-2 into L3.
- Leave L4 and L5 empty.
- Drag CE-20 into L6, then drag the same library entry into L7 to represent both stereo channels.
Match the physical loop numbers here. You will choose the order in which effects process your signal later in the Preset Editor. The pedal names and colours help identify each effect.
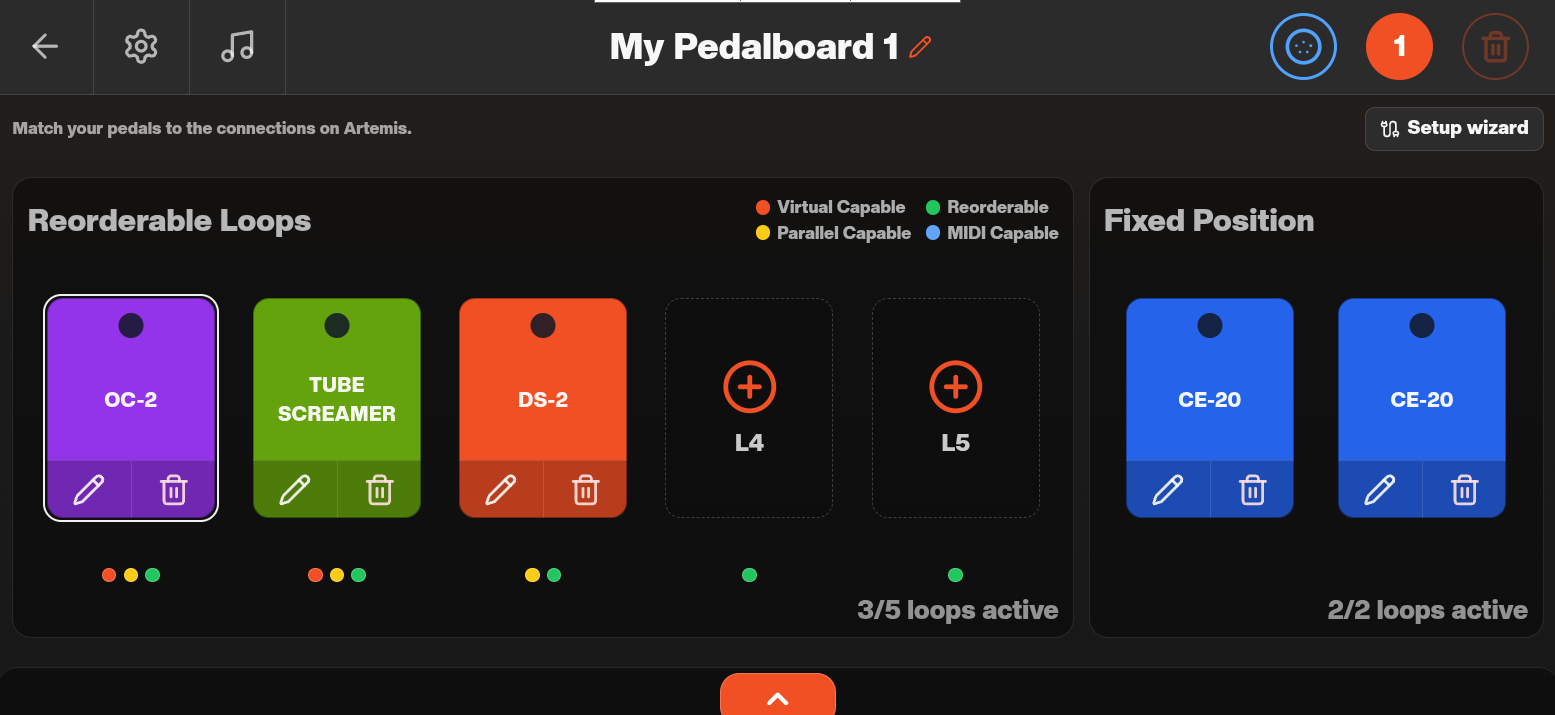 Completed My Pedalboard with OC-2 in L1, TUBE SCREAMER in L2, DS-2 in L3 and CE-20 in L6 and L7
5. Check your setup and continue
Compare the on-screen assignments with the cables connected to Artemis. For this example, L1–L3 should contain the three mono pedals, L4–L5 should be empty, and CE-20 should appear in both L6 and L7.
If you also use MIDI-controlled pedals, see MIDI Librarian for instructions on finding your devices in the MIDI library and adding them to the current pedalboard configuration.
Once your pedalboard setup is complete, continue to Quick Start to get your first sound, or Building a Preset to arrange your effects and create your first preset.
Presets, Songs and Setlists
Houston organises your sounds into presets, songs and setlists:
| Item | Purpose |
|---|---|
| Preset | A saved sound containing routing, virtual pedal and amp settings, MIDI messages and mixer levels. |
| Song | A performance layout with up to five presets or utility actions, recalled using the five footswitches. |
| Setlist | An ordered collection of songs for a performance. |
Build your sounds first, arrange them into songs, then organise your songs into a setlist. A song can use descriptive preset names such as Intro, Verse and Chorus to make sound changes easy to follow while playing.
The Jam Page is the song performance page. It lets you switch between the song's sounds and use utility actions such as the tuner, recorder, mute and MIDI functions. See Jam Page overview for its controls and Creating a song for the complete setup walkthrough.
For direct control of individual pedal loops, use Stompbox Mode. Its bypass states and pedal order are independent of songs.
Presets can be shared between songs. Changes to a preset's mixer levels or expression assignments also affect the shared library preset, so check other songs that use it after editing.