Maintenance and Troubleshooting
On this page
Updates
For the recommended update method, see Wi-Fi Updates. To transfer an update from your computer, follow the USB instructions below.
If you contact support about an update, include the Version and Build values shown under Power in Launchpad, the name of the update bundle you tried to install and any error message.
Keep the DC supply connected throughout installation. After a system update restarts Artemis, complete the matching firmware update if Launchpad prompts for it.
If an update fails, open View update, record the error details and use Reattempt update after resolving the reported problem. A failed firmware stage offers Retry Firmware Flash; a required stage offers Complete Firmware Update. Follow the displayed sequence and restart when requested.
If Launchpad reports a recovery after an interrupted update, read the recovery message before attempting the update again. If Artemis cannot return to Launchpad, or the same failure repeats, contact support with the bundle name and error details. Factory Reset removes user data; it is not a system-update repair procedure.
USB Updates
-
Download the latest ArtemisOS update bundle to your PC or Mac from trinity-labs.co.uk/downloads.
-
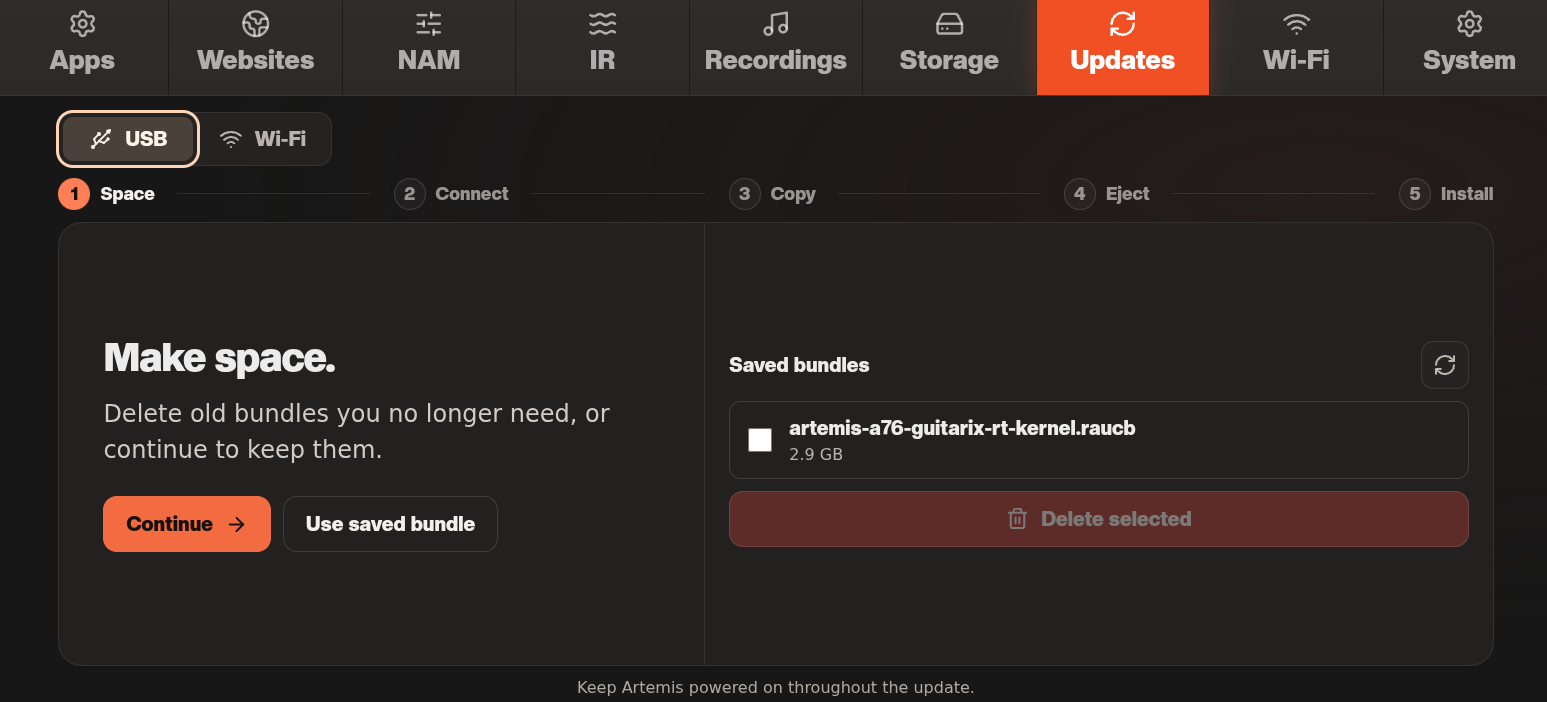
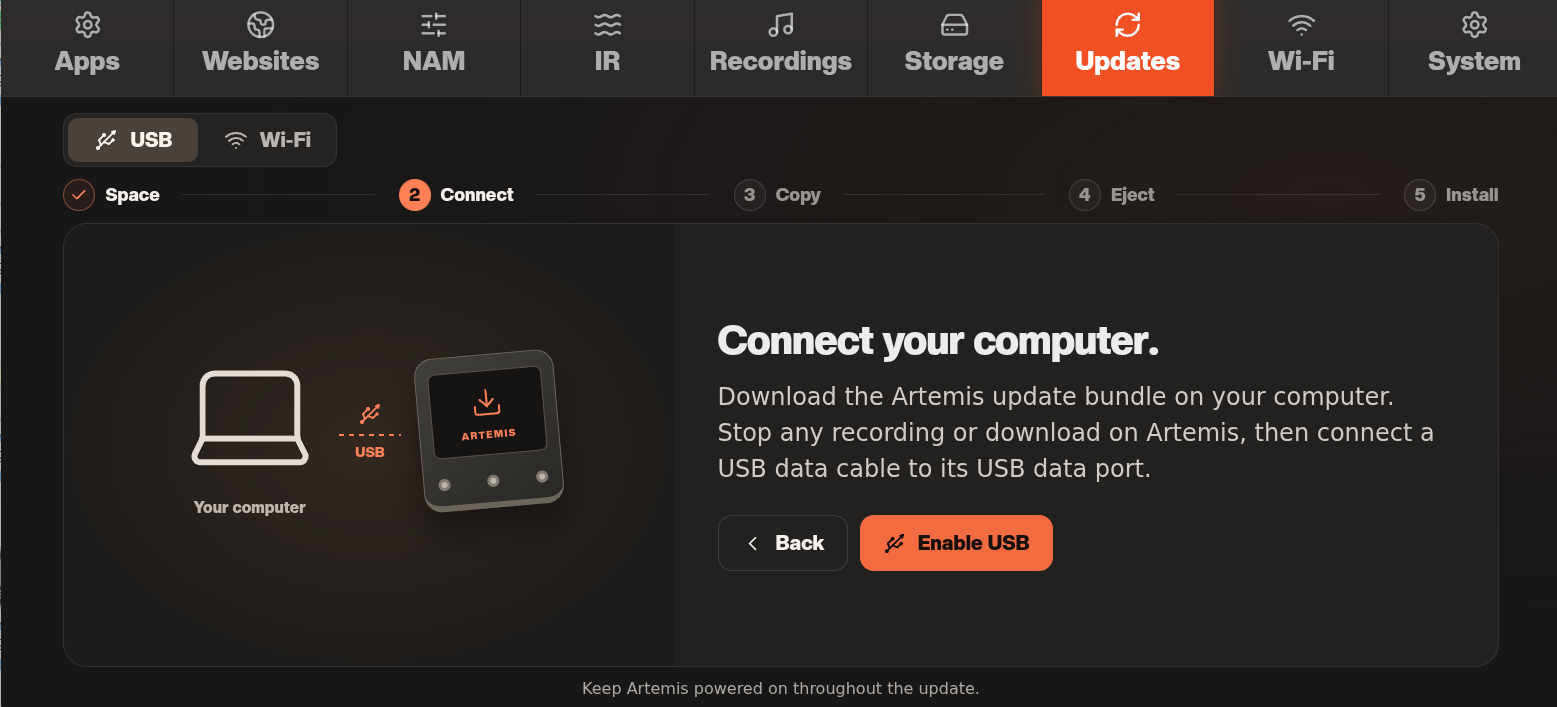
Connect Artemis to your computer using a USB cable. Open the Updates tab in Launchpad, select USB, and start the guided wizard.
-
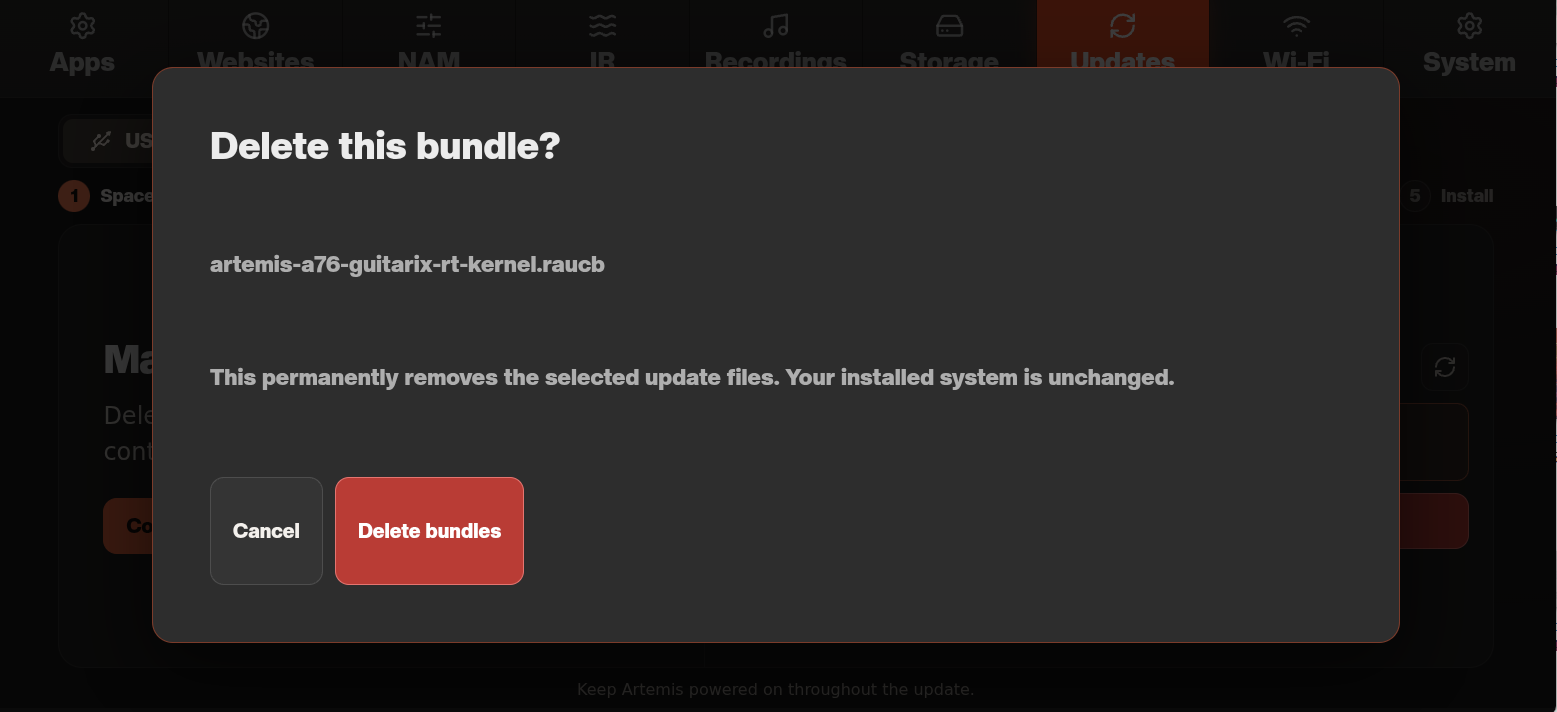
If prompted, delete a previously cached update bundle to make space for the new one.
-
Enable the USB connection when prompted. The ARTEMIS drive will appear on your computer.
-
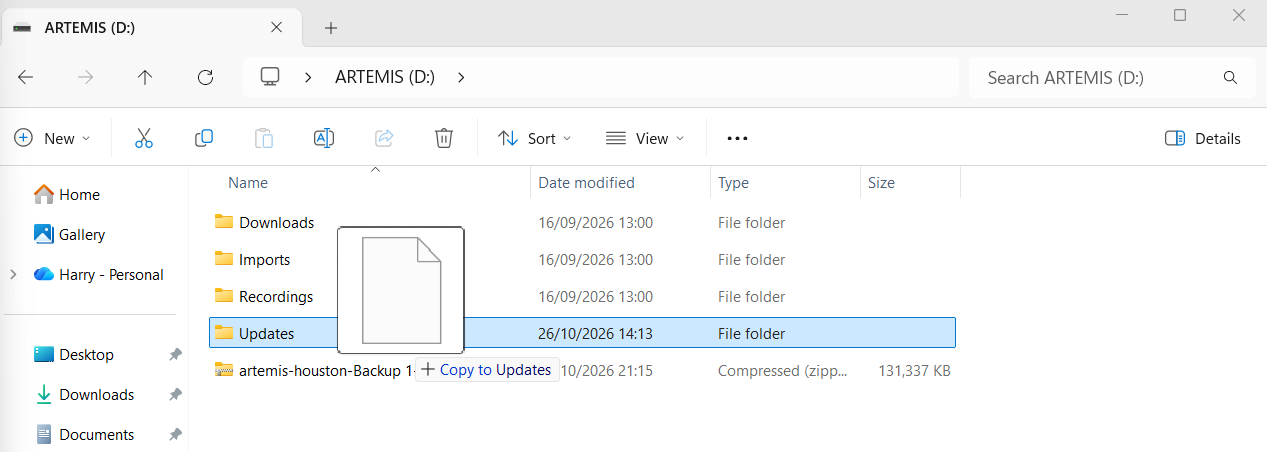
Copy the downloaded update bundle into the Updates folder on the ARTEMIS drive (
ARTEMIS/Updates). Wait for the copy to finish. -
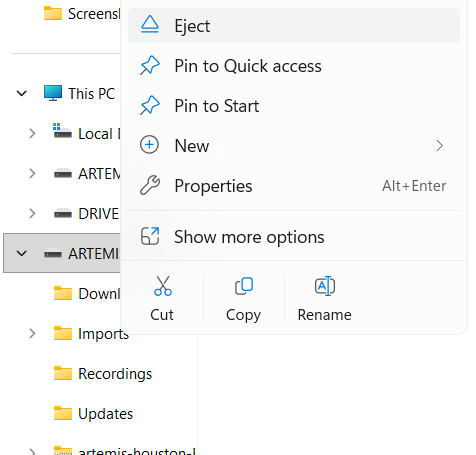
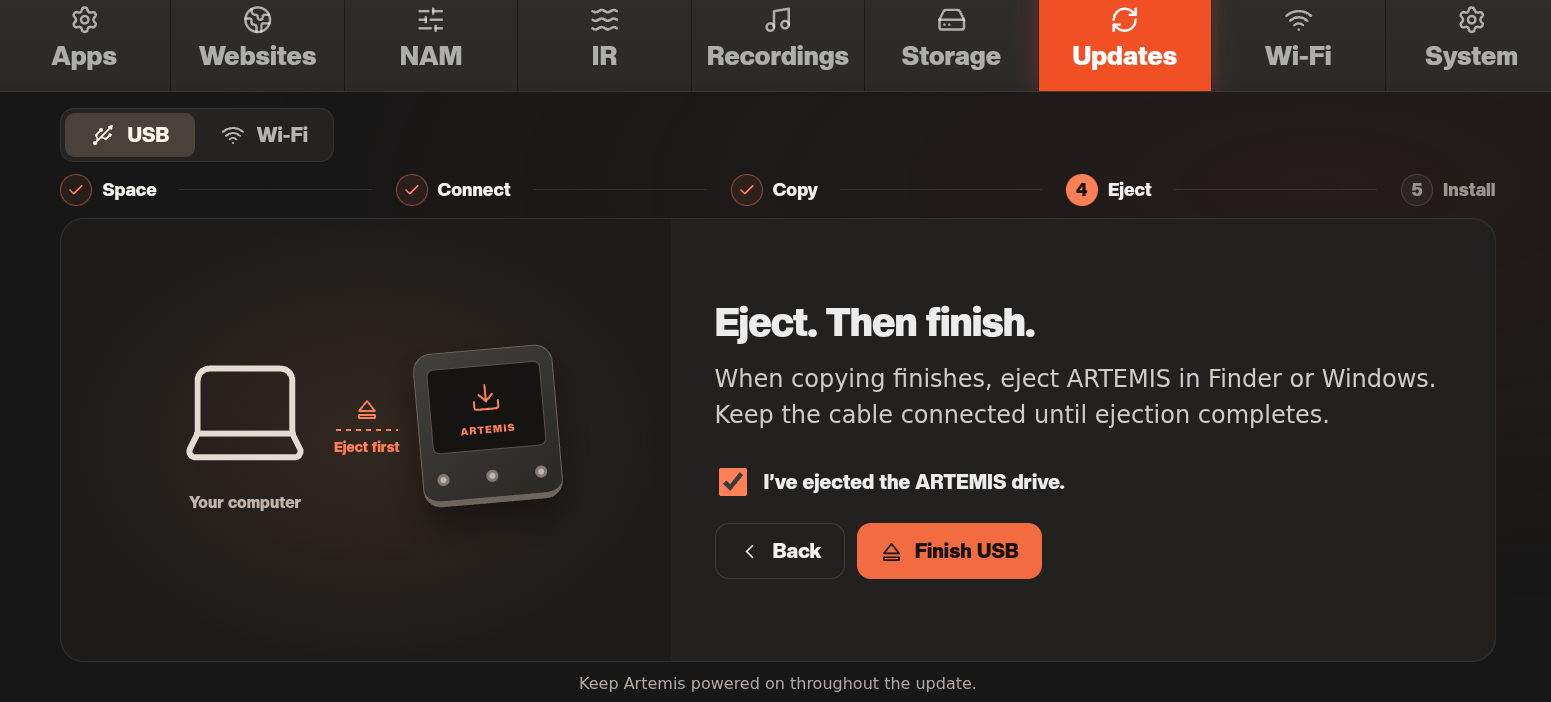
Safely eject the ARTEMIS drive from your computer, then continue in the wizard.
-
Follow the remaining prompts to install the update.
-
When installation is complete, reboot Artemis when prompted. Complete the matching firmware update if Launchpad requests it, following any further restart prompts.
Backups and recovery
Launchpad's Storage tab provides Archive, Restore and Factory Reset. Save your work and return from Houston before using these controls. Finish any active USB transfer first so Artemis owns the storage.
Create and copy a backup
- Open Storage → Archive.
- Enter a recognisable Backup name, such as a date and tour or project name.
- Tap Create Archive and wait for the success message.
- Enable USB transfer and connect the computer.
- Copy the ZIP archive whose name begins artemis-houston- from the root of the ARTEMIS drive to the computer.
- Safely eject the drive and finish USB transfer in Launchpad.
The archive contains Houston's stored application data, including presets, songs, setlists, pedalboard data, imported NAM/IR libraries and application state stored with that data. It is a user-data backup, not an image of the operating system.
The separate USB transfer area is not included. Copy Recordings, other samples, pending Imports, downloads and any other files you want to keep from that drive separately. Keep the archive on another device; a copy stored only on Artemis cannot protect against loss of the unit.
Restore a backup
Restore replaces the current Houston user data with the selected archive. Create a new archive first if you want to keep the current state.
- Copy an unmodified Artemis backup ZIP to the root of the ARTEMIS drive over USB. Keep its original archive filename.
- Safely eject the drive and finish transfer in Launchpad.
- Open Storage → Restore and select the archive.
- Confirm with Restore Archive and wait for completion.
- Reopen Houston and check your pedalboard, presets, songs and setlists before playing.
A restore replaces Houston data; it does not restore separately copied recordings or pending import files. Transfer those back separately when needed.
Factory reset
Factory Reset permanently deletes Houston's stored user data, including its sound libraries and saved performance arrangements. It also clears application state stored in that data area. It does not reinstall ArtemisOS or erase the separate USB transfer area.
Create an archive and copy it off the device first. Then open Storage → Factory Reset, read the warning and confirm Factory Reset. Wait for completion, reopen Houston and set up your pedalboard again, or restore a saved archive.
Troubleshooting
Start with a low listening level and change one thing at a time. If a simple working preset passes audio, add the rest of the route back gradually to isolate the problem.
| Symptom | Checks and resolution |
|---|---|
| No sound | Check DC power, instrument and output cables, then test the instrument directly into the amplifier. In Artemis, select the connected input, bypass unused loops, check the output choice and clear mixer/global mute. Raise levels gradually. An enabled loop needs a working send-to-pedal-to-return connection. |
| One side of a stereo setup is silent | Check OUT L/R cables, both stereo pedal inputs/outputs and both L6/L7 returns. Check both output selectors and the bus levels. Bypass the stereo loop to help isolate its wiring. |
| Distortion or an unexpected volume change | Compare a simple clean preset, reduce the level feeding the distorted stage and check clip indications. Review pedal outputs, virtual inputs/masters, bus mix, pads and expression assignments. |
| Thin or hollow sound when mixing buses | Listen to each bus alone. Compare Bus B polarity, then consider the timing difference between analogue and digital paths. Try a serial route if the blend remains poor. |
| Hum or noise | Test a short instrument-to-Artemis-to-amplifier route, then reconnect pedals one at a time. Check patch cables and pedal supplies. Do not remove protective mains earth connections. |
| Footswitch does not perform the expected action | Check the current page, Invert Menu/Stompbox state and configured normal/hold actions. A utility slot performs its utility instead of selecting a sound. |
| Holding a footswitch does nothing | Open Settings → Footswitches, select the switch and choose a function in its Hold row instead of No Action. Check Hold Time and test on the normal Jam Page with Stompbox Mode and the recorder closed. Follow Enabling footswitch hold actions. |
| Expression pedal does not respond | Check the TRS connection, selected EXP source, enabled state, In meter and Min/Max calibration. Then check the active preset's parameter assignment and range. |
| MIDI does not respond | Check OUT-to-IN cable direction, Receive/Thru mode, channel and the live map. Use the MIDI troubleshooting table to isolate numbering, clock and duplicate-message problems. |
| The ARTEMIS drive does not appear | Use a USB data cable, keep DC power connected and enable transfer in Launchpad. Try another computer port or cable. After use, eject on the computer and finish transfer on Artemis. |
| A downloaded NAM or IR is missing | Complete the download or copy, finish USB transfer, check Manage library, then open Houston to import it. Check the file format and any import error. |
| A preset reports a missing model | A referenced file may have been renamed or deleted. Select an available replacement and save, or restore the required library from your backup. |
| Changes disappear after switching presets | Accept the Preset Editor or mixer save prompt for sound changes. Save the song for slot assignments. Wait for the setlist's saved status. Stompbox state is independent of song presets. |
| Clicks or dropouts with a complex sound | Compare a simpler preset, reduce processing stages and test captures individually. Report persistent problems with the affected preset and model details. |
Getting support
Email contact@trinity-labs.co.uk or raise a support ticket.
Include your Artemis hardware revision and software version, a description or photograph of the wiring, the preset or song involved, and the steps that reproduce the issue. Add any on-screen error message and relevant screenshots. For an update problem, include the update bundle name and the last step that completed successfully.